|
Cape Cod style homes are popular in the coastal communities of Southern California, and it's a style that appeals to arguably the largest segment of single family home buyers in the nation.
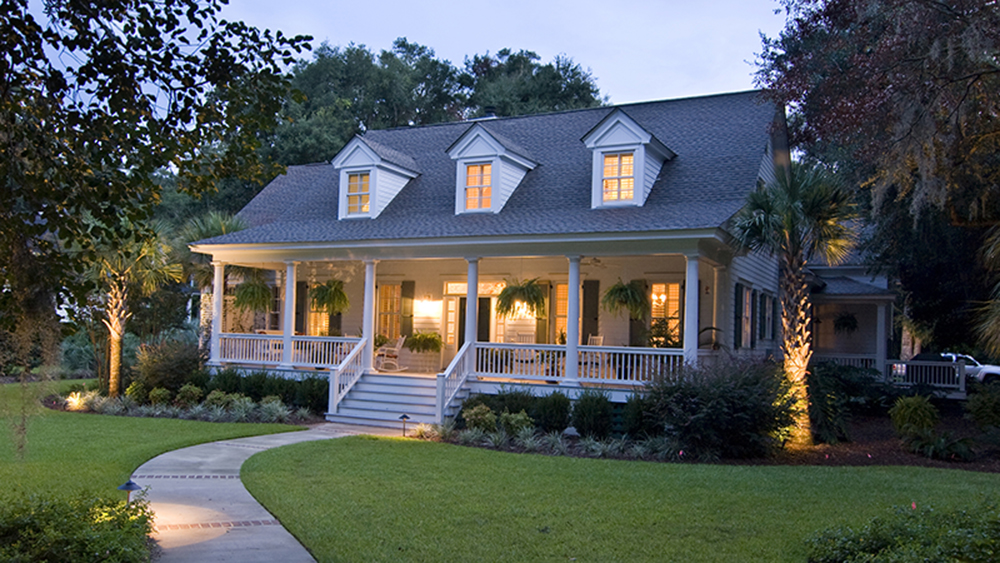
Cape Cod home architecture is one of the earliest style of homes built the in United States, dating back to the 1600s when English settlers drew their wisdom from the simple cottages in England. They adapted this original British design to deal with the harsh winters of the Northeast by having the chimney the focal point of the interior, providing heat to rooms clustered around it. The exterior utilizes cedar shingles on the fascia and roof to keep the cold out and a steep roof helps to discard rain and snow quickly. Cape Cod style architecture was created mainly for function, but offers a classic and oft sought after appearance. How do you identify a Cape Cod style home? There are some key features to look for including a large, central chimney, steep roof, windows on each side of the door and dormers on each side of the chimney, a narrow captain's stairway, and shingle siding weathered gray shingles are one of the most recognizable elements of a Cape Cod style home. Due to their age, this style of home may be due for a major remodel. Luckily, Cape Cod style homes in Southern California are often in better shape than East Coast versions, which can date back to the 17th and 18th centuries. On the bright side, the simple construction of this architecture style can make is easy to adapt these homes to your modern needs. Cape cod style homes are usually cozy may boast a less expensive asking price since many were built during the 1950s. A cape cod style home can be a terrific starter homes or a way for retired couples to live out their days in the community of their choice without the costs associated with larger, modern homes. When it comes to purchasing a home the architectural style may be overlooked in favor of focusing on location, school districts, available homes and other pressing constraints. But for some buyers looking for their Southern California dream home, architecture styles may be a hugely important aspects to choosing their new home.
0 Comments
The South Coast Botanic Garden is a great place to briefly escape life in the urban sprawl and reconnect with nature. Unfortunately, for many, it’s also a well-kept secret.
Located in beautiful Palo Verdes, the South Coast Botanic Garden is sometimes referred to as “the jewel of the Peninsula.” The 87-acre public garden is home to more than 200,000 plants and 2,000 species of plants from around the world, which also serves as an oasis for more than 200 species that make the garden their home or use it as a stop during their annual migration. The botanic garden includes many themed specialty gardens, including the Japanese Garden, Fuchsia Garden, Herb Garden, Children’s Garden, and 2-acre James J. White Rose Garden. The South Coast Botanic Garden has a unique history as one of the world's first botanical gardens to be developed over a sanitary landfill. It was first created on the site of a sanitary landfill in 1961 by the Los Angeles County Board of Supervisors at the request of a citizen’s group. The site had operated as an open-pit mine from 1929-1956 before it was sold and then became the site of a creative and innovative land reclamation project, transforming it into an urban oasis for all to share. One could probably spend an entire day taking photographs on the garden’s extensive walking trails, but there is certainly much more to experience. The South Coast Botanic Garden offers a number of adult and family programs, workshops, and tours. Many groups use the various event spaces available including an amphitheater, picnic areas, and wedding gazebos. Many visit the South Coast Botanic Garden when in the mood for a quiet and peaceful afternoon. For the latest photos and albums from the botanic garden, as well as updates and event information, check out their Facebook page, or take a virtual tour on the garden’s official website. South Coast Botanic Garden 26300 Crenshaw Blvd. Palos Verdes Estates, CA 90274 Phone: (310) 544-1948 Website: www.Southcoastbotanicgarden.org For many buyers, the first step into real estate ownership is purchasing a duplex or multi-family property, and living in one of the units.
Known as owner-occupied rental housing, living in your own rental property can carry some distinct advantages. Not only can you use rental income to offset the amount you pay against the mortgage, there are several tax deductions and depreciation advantages to living in the same property you also rent. Living in your own rental property, of course, isn’t for everyone. Whether you will gain greater income from an investment property or an owner-occupied rental property ultimately depends on your individual circumstances. You should consult a financial consultant or tax advisor to discuss your bottom line. But here are several of the advantages to owner-occupied income properties to consider: Higher quality tenants. Many renters are particular about who they have to live next to, and having an owner-occupied building is reassuring. Owners are also selective about who they allow to live next door, thus attracting higher-quality tenants. It’s a beneficial dynamic that brings tenants who are willing to pay higher rent. Writing off expenses. Simply put, owners who occupy their rental properties are allowed to write-off their rental expenses against their rental income. Any expenses that apply to tenant-occupied units can be used as an advantage. Lower management and maintenance costs. Occupying your own rental property minimizes property management and maintenance costs that are typically handled by third parties, thus saving a certain percentage of gross income. The value of depreciation. Depreciation allows an owner to deduct a portion of the building’s cost, plus the cost of capital improvements, annually from the income of the building. While it is allowed only for the portion of the building used for rental purposes, it can sometimes shield rental income from taxation. The tax advantages. Along with depreciation tax, owners who live in their rental buildings can deduct the prorated part of the mortgage interest from their income. Property taxes can also be deducted. Selling the property. Owner-occupied housing is also shielded from property gains taxes (at certain limits) when sold, and those that have been lived in for certain time periods – usually more than a year – are subject to lower capital gains taxes than other investments. Through a tax-deferred exchange, owners who rent where they reside can combine both tax advantages and also defer gains on the sale of the property when they purchase another property within a limited time frame. It's no secret that first impressions are important. So when it comes to your home, don’t overlook the impact of curb appeal on potential buyers and the value the exterior appearance can add to the sales price.
Adding curb appeal doesn't have to be expensive, time consuming or complicated. By addressing the basic curb appeal principles, you can create a warm, friendly and inviting atmosphere outside and a strong initial perception of what's left to see inside. Remember, the outside of your home is the first thing a buyer will see. Try to view it from their perspective, and focus on improvements that will appeal to the greatest number of buyers. The Entrance Create a focal point by painting or refinishing your front door. Paint faded trim and molding, and replace worn hardware, light fixtures and house numbers. Add style and appeal to the entryway with symmetry and a blast of color in mind, such as potted plants and sidelights. Lighting Not everyone will see your home during the day. While also providing safety and security, lighting along the walkway is aesthetically appealing and leads guests to the front door. If installing wired lighting isn't an option, go for lower-voltage solar powered fixtures. Do look down The condition of the walkway and driveway can have a major impact on curb appeal. Remove weeds and overgrowth, and repair cracks or stains. Simply power-washing, resurfacing or resealing can sometimes do the trick. For major impact that adds value, replace concrete with pavers, stone or bricks for a custom feel, or use them to widen existing walkways. Landscaping Terrible landscaping is an automatic turnoff. Instead of rebuilding your landscaping, improve what you have by cleaning up weeds, overgrowth and dead plants; restoring color with new plants; adding mulch and defining perimeters. Focus on a mix of colors and sizes at the front of the yard, along the walkway and immediately in front of the house for dynamics that accent and frame your home. Dress it up Paint is inexpensive, but a few new coats can transform the look of a home. Along with obvious defects, give a fresh look to flower boxes, shutters, railings, trim and molding with accent colors for a quick and inexpensive facelift. The final walk-through is the last step to take just before the home-buying process is complete, and it is a crucial step.
The final walk-through is not a home inspection. But it is the opportunity to ensure the condition of the house hasn’t changed since your last visit, and the chance to ensure you’re getting the same house and amenities you agreed to purchase. It’s also the time to confirm that any previously agreed-upon repairs have been made and the terms of your contract are all met. It’s tempting to cruise through a final walk-through, or even skip it altogether, especially when you’re pressed for time. But that’s never a good idea. A buyer’s walk-through not only gives you confidence in your purchase, but it can pinpoint any lingering problems that need to be settled before closing. Remember, once you close on the home, the previous owners are not obligated to fix any new damages. Here are four steps to be aware of for a final walk-through: The right timing. Timing is important when it comes to the final walk-through. It’s often suggested to schedule the walk-through 24 hours in advance of closing, but no more than 48 hours before to ensure enough time to address any potential problems that could arise. Put aside an hour to conduct the walk-through, enough time for you to be extremely thorough. Double check conditions and repairs. The final walk-through is your chance to verify all promised and negotiated repairs with the seller were met. Include your inspector or general contractor if you have any concerns about the condition of the property. It is sometimes recommended to request receipts from the sellers for any items that have been repaired, along with the contact information for contractors, to prove the work was done. What to look for. Take your contract with you to refer to during the final walk-through. Have a list of items that are staying with the house, and make sure that all items that should have been removed have been done so satisfactorily. Make sure there is no new damage – especially those that could have occurred when the seller was moving out – and check the yard, garage, attic and basement thoroughly for unwanted items. Make sure everything works. It’s good to have a checklist as you go through the house room-by-room. Check that all light fixtures, faucets, and appliances are functional. Make sure all doors and windows open, close, and lock properly and no screens or storm windows are missing. Check to see that all electrical outlets are undamaged, and that circuit breakers are properly labeled. Turn the heat and/or air conditioning on and off and flush all toilets. Don’t ignore the outside of the house, walking the perimeter to look for leaks, checking lights and the garage door. Pay special attention to issues that could have previously been hidden, inside and out. Taking action. If you do identify problems, you have options, including walking away from the deal. But be cautious of walking away due to problems that are not significant. You can choose to postpone the closing, and you do have legal recourse for issues that were negotiated to be fixed. Make any defects or new issues known to your Realtor. Many of us have been touched by cancer personally or through loved ones. This past month we learned that our young nine-year old friend, Jacob Conde was diagnosed with Ewing’s Sarcoma of his left femur and pelvic bone. Jacob is a third grader at Hermosa Valley and his younger brother Lucas is a second grader at Hermosa View. As many of you know the Conde family, who have been very active in the community, let's join in supporting them during this difficult journey!
Jake started chemo 4/17/15 at UCLA, and his treatment plan includes approximately 10 months of chemo, surgery, and radiation. You can help by making a donation at Jacob's fundraising page: https://fundrazr.com/campaigns/ayhq3/sh/a4irK8 You can leave Jacob a note on his Facebook page: https://www.facebook.com/groups/1571642406441269/ You can also support Jacob’s father, Roger, and Carl Dickson, Liam Delury and Dave Kendall, who will be riding in the upcoming Tour de Pier Cancer Fundraising event at Manhattan Beach Pier on May 17th. Come out and root them on as they ride a spin bike for 4 hours with hundreds of others who are coming together to share similar stories. You can support Sand and Surf team here: http://bit.ly/1GaEUpM |
Categories
All
Archives
June 2016
|
|
Contact Kirsten to get started today.
(310) 756-3524 [email protected] #DRE 01450452 Ask her about her newsletter to get current South Bay Market information and real estate news right to your inbox... no spammy ones, promise! |
|
Copyright © 2021 Kirsten Cole. All rights reserved.


 RSS Feed
